

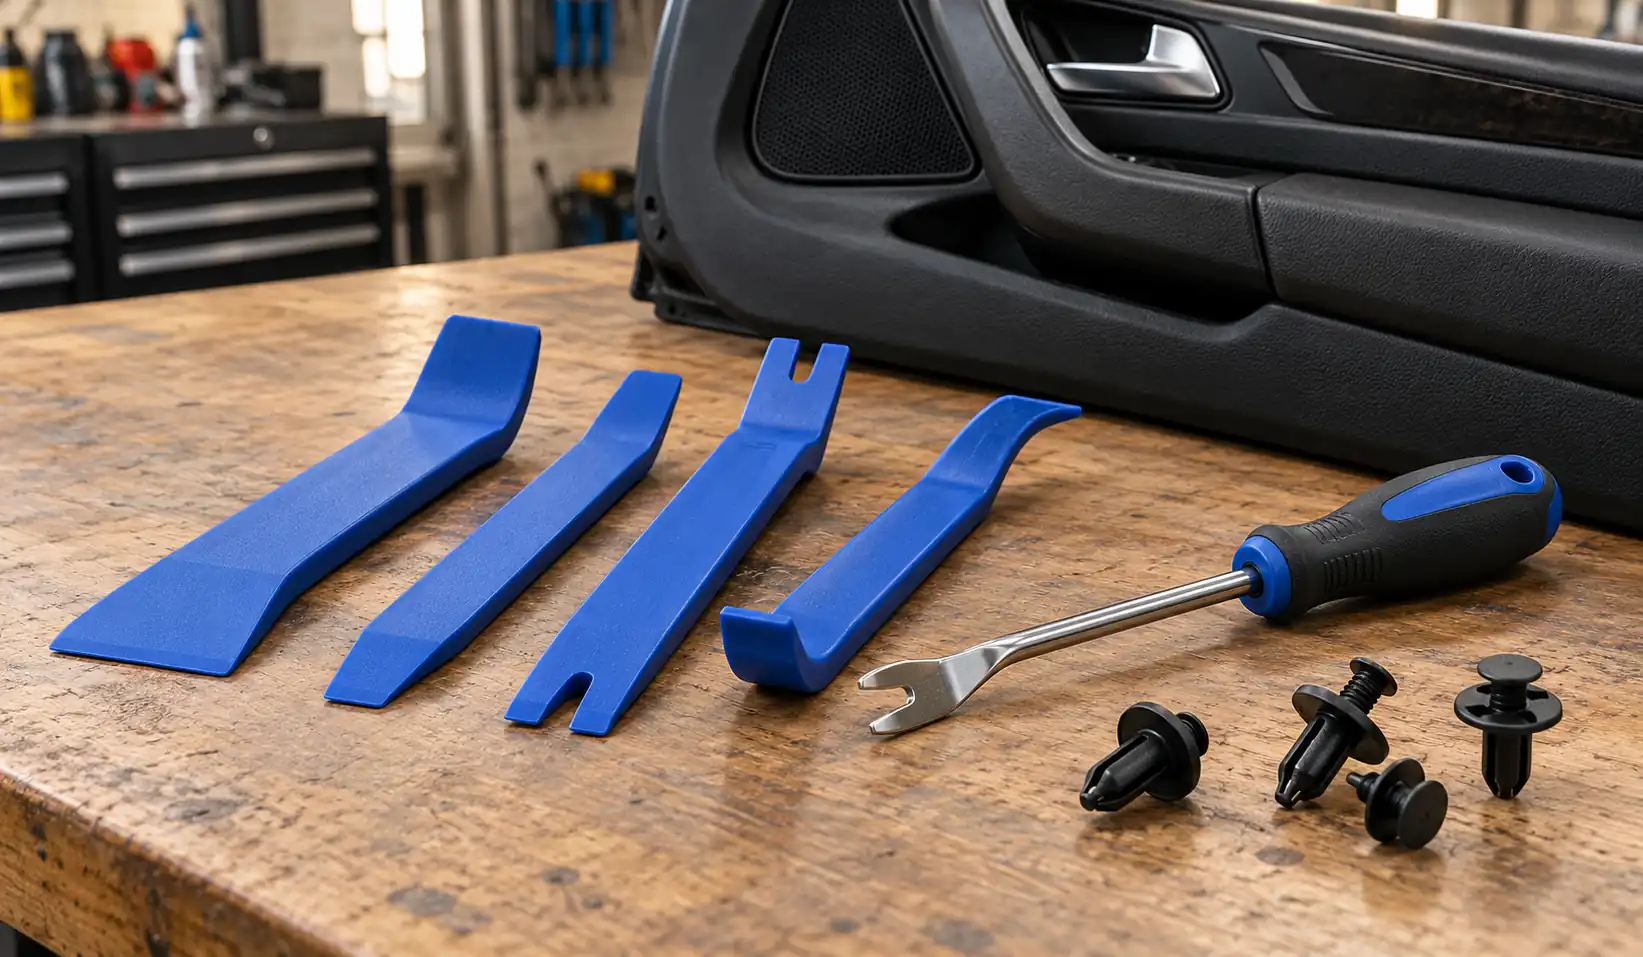
Levapioli is a term used in Italian automotive tool catalogs for tools that remove trim pins, clips, and similar fasteners. In the United States, you are more likely to see these products labeled trim pin removers, panel clip removers, or trim removal tools.
Their purpose is straightforward: help release a fastener or trim piece with controlled pressure. They can be useful when removing a door panel, accessing a speaker, or taking off a plastic cover for maintenance.
The important skill is matching the tool to the attachment. This guide explains the terminology, common designs, material choices, and basic removal techniques so you can approach a small repair with a clearer plan.
What Does Levapioli Mean?
In a workshop context, Levapioli refers to removal tools associated with pins and trim fasteners. Italian manufacturers use the term for several products, including nylon sets and versions with stainless steel blades.
It describes a tool category rather than one universal design. Two products carrying the name may have different tips, widths, and intended applications. The product photograph and description therefore matter more than the label alone.
For U.S. shoppers, searching for an automotive clip remover or trim pin removal tool usually provides more useful results. Add the vehicle location or fastener type when you need something specific.
How a Trim Pin Remover Works
Many trim removal tools act as small levers. Their tips slide beneath an accessible edge, while movement at the handle creates lifting force. The contact point supporting the tool must withstand that pressure without denting or cracking.
A forked tip can fit around a fastener stem and support opposite sides of its head. A broad plastic wedge serves a different purpose: spreading contact across an edge while opening a panel gap.
More leverage also means more opportunity to damage a part. Position the tool close to the attachment and watch how the surrounding material responds. A bending panel is a reason to reassess the approach.
Common Tool Shapes and Their Uses
Trim tool sets contain different shapes because access varies around a vehicle. A straight tool that works in an open trunk may be awkward behind a door panel or inside a recessed opening.
The table compares common designs in this broader tool family. Clip removal pliers are a related option, although catalogs may list them separately from Levapioli tools.
| Tool design | Typical purpose | Main consideration |
|---|---|---|
| Forked pin remover | Lift accessible fastener heads | Fork opening must fit the stem |
| Wide nylon wedge | Separate trim edges | Avoid bending unsupported plastic |
| Angled remover | Reach recessed attachments | Confirm room for handle movement |
| Clip removal pliers | Release compatible pins or panel clips | Jaw design must suit the fastener |
Choose the shape that reaches the attachment directly. A tool that fits securely gives better control than one balanced on a small corner of the clip.
Check the working dimensions when they are listed, especially fork width and tip thickness. Imported tools may use millimeters rather than inches. Overall handle length tells you little about whether the tip will enter the gap or support the fastener properly.
Nylon vs. Metal: Which Material Fits the Job?
Nylon trim tools are often a useful starting point around interior plastics and finished surfaces. Their broader profiles can spread pressure, and they generally present less risk of gouging than exposed metal edges.
Metal removers offer greater stiffness and can have thin working tips that reach beneath certain fastener heads. However, careless contact with paint, soft trim, or thin sheet metal can leave a mark.
Neither material guarantees damage-free removal. Dirt trapped beneath nylon can scratch a finish, while an overly flexible wedge may encourage excessive force. Select the material alongside the tip shape, available clearance, and surface condition.
Where These Tools Are Used on a Vehicle
Levapioli tools and their U.S. equivalents are useful wherever compatible clips hold removable panels or covers. Typical locations include interior trim, trunk liners, and some exterior plastic components.
Common projects involving trim fasteners include:
- Removing a door panel for speaker access.
- Opening console trim for an approved accessory installation.
- Removing trunk lining to reach service components.
- Releasing clips on a fender liner or splash shield.
Each assembly can also contain screws, sliding hooks, wiring, or adhesive. Check the removal sequence for the exact model and year before assuming that every attachment releases by pulling outward.
Identify the Fastener Before You Pull
Plastic fasteners can look similar while using different locking mechanisms. Some expand when a center pin is inserted; others use barbs, threads, or locking tabs. The mechanism determines the release method.
Inspect the head with good lighting and compare it with the vehicle’s service information. A small central recess may indicate a separate locking pin, but appearance alone does not establish how it moves.
| Fastener style | What to establish before removal |
|---|---|
| Two-piece push pin | Whether the center lifts or pushes inward to unlock |
| Screw-type retainer | Whether the center must be unscrewed first |
| Barbed panel clip | Correct pulling direction and tool placement |
| Locking-tab connector | Which tab releases the connection |
If a fastener remains firmly locked, stop and check its design. Pulling harder can break the head while leaving the retained portion inside the mounting hole.
Also distinguish removable clips from permanent rivets or bonded attachments. A trim remover cannot make every connection reusable. Those attachment types require their own service procedure and, where specified, replacement hardware during reassembly.
Prepare the Vehicle and Work Area
Park securely, switch off the vehicle, and arrange enough light to see the attachment. Clean loose grit from the working area. Keep a tray nearby for screws and clips, and photograph their positions before removal.
Where appropriate, protect finished edges with suitable automotive masking tape or a surface protector. Check compatibility with delicate or refinished surfaces. Protection reduces accidental contact but cannot prevent damage caused by excessive pressure.
For work near airbags or electrical equipment, follow the manufacturer’s isolation procedures and specified waiting periods. These vary by vehicle. Airbag trim and related attachments deserve professional attention when the required procedure is unclear.
How to Remove a Basic Push-Pin Fastener
Start by confirming that the fastener is a reusable two-piece design whose center pin lifts to release. Other designs require a different sequence, so this example should only be applied after identifying the clip.
Slip a suitably sized tip beneath the accessible edge of the center pin. Raise it enough to unlock the outer body, using small movements. Avoid dragging the tip across the surrounding finish.
Once unlocked, position the appropriate remover beneath the outer fastener head. Support it evenly and lift in line with its mounting hole. If resistance remains unexpectedly high, inspect for dirt, damage, or incomplete unlocking.
After removal, check the stem, head, and locking section. Replace damaged fasteners and any designated for one-time use. Reinstall reusable clips according to their design, then confirm that the panel sits flush and remains secure.
Before pressing a panel back into place, align its hooks and clips with their matching openings. Press at the specified attachment points. If an edge stands proud, check alignment rather than striking the panel to close the gap.
Mistakes That Damage Clips and Trim
A common mistake is lifting a large panel far from its attachment points. The panel flexes while the clip stays seated. Working near each fastener directs force toward the connection and reduces unnecessary bending.
Another mistake is treating every clip as reusable. A fastener may look acceptable yet have damaged retaining features. Follow replacement instructions and use the correct part rather than forcing a similar-looking clip into place.
A flathead screwdriver can concentrate pressure on a narrow metal edge. Although a screwdriver belongs in the job when a screw requires it, a purpose-made remover usually offers a more suitable contact shape for releasing clips.
Keep control of the loosened panel. Wiring, handle cables, and other connections may remain attached behind it. Support its weight while checking those connections instead of letting it hang or pulling it farther away.
When removing a door panel, preserve the moisture barrier behind it and restore its seal as specified. Missing or poorly installed barriers can affect vehicle systems. Photograph the original arrangement so the wiring, clips, and barrier can be restored correctly.
Choosing and Caring for a Beginner’s Kit
Build a kit around your planned job. For occasional interior work, a small selection of nylon wedges and a compatible clip remover may cover the required shapes. A larger collection helps only when its extra tools have useful applications.
Before choosing a set, check these practical features:
- Smooth tips without sharp molding seams or burrs.
- Fork openings suited to the fasteners you will remove.
- Enough stiffness for controlled movement.
- Handles that remain comfortable in the available space.
- Clear descriptions of materials and intended uses.
Inspect tools before each use, especially the working edges. Retire cracked nylon pieces or damaged metal tips that could slip. Clean away grit with a material-compatible cleaner, dry the tools, and store them where their tips stay protected.
Keep replacement clips organized separately by application. Match the original stem diameter, locking design, and thickness of material the clip holds. A vehicle-specific part number is preferable when it is available. Generic assortments can contain useful spares, but a close visual match does not establish the correct fit.
Final Thoughts
Levapioli is a useful term to recognize when reading Italian automotive catalogs. For most U.S. readers, trim pin remover or panel clip removal tool describes the same practical area of equipment more clearly.
The best results come from understanding the attachment before choosing a tool. Identify the locking mechanism, select a suitable tip, and apply pressure where the fastener connects to the panel.
Start with a clearly documented task and inspect the parts before reassembly. Knowing when to stop, reposition, or replace a damaged clip is as important as knowing how to lift it out.
(FAQs)
What is Levapioli in English?
In automotive tool catalogs, the closest English terms include trim pin remover and trim removal tool. The exact translation depends on the product’s design. For U.S. searches, panel clip remover or automotive fastener removal tool can also help you locate the appropriate equipment.
Is Levapioli a brand or a type of tool?
Manufacturers use the word as a product description for removal tools rather than as one exclusive brand name. Always check the actual manufacturer, model, material, and intended application. Products described with the same term can differ substantially in shape and suitability for a particular fastener.
Can beginners use trim removal tools?
Yes, beginners can use them for suitable tasks with clear vehicle-specific instructions. Start with an accessible attachment and understand how it releases before applying pressure. Panels involving airbags, hidden wiring, or unfamiliar locking hardware require additional knowledge and may be better handled by a technician.
Are nylon trim tools completely scratch-proof?
No. Nylon generally offers a gentler contact surface than exposed metal, but trapped grit, rough edges, and excessive pressure can still mark a finish. Clean both surfaces, inspect the tool tip, and protect vulnerable edges when appropriate. Careful placement remains necessary regardless of the material.
Can I reuse plastic clips after removing them?
Some clips are reusable when undamaged, while others require replacement after removal. Check the vehicle’s instructions and inspect the locking features. Replace clips with cracked heads, bent stems, or weakened retention. Reusing a clip that no longer holds correctly can leave trim loose or rattling.
Why will a trim clip not come out?
The locking pin may still be engaged, the tool may be poorly positioned, or the attachment may use a different release method. A hidden screw can also make a panel seem stuck. Stop, improve visibility, and confirm the removal sequence before increasing force or changing tools.



[…] BMW X4 models combine a digital display with physical controls for several everyday functions. Navigation, voice commands, smartphone integration, and the My BMW app add […]
Comments are closed.